Getting Started with Interactive Server Side Rendering (Interactive SSR) in .Net 8.0 Blazor
With the ever-evolving websites, Microsoft is now offering interactivity in the blazor .Net 8.0 both at the server and client sides. In this blog, we will deep dive into the interactive server-side rendering and see how it has revolutionized the web development experience. Are you ready to explore the interactivity on the server side? Let's begin!
Scenarios of Interactive SSR in real life
Imagine an e-commerce website for products. Interactive SSR will enhance the user experience such as:
- A dynamic process of filtering products by category. The server side handles the filtering process on the server, generating the filtered result.
- Interactive server-side rendering is beneficial for pagination. The server handles the request to show a listing of the next set of products when the user navigates to a new page each time.
- Servers can utilize the search history of users to recommend products based on their new preferences.
Unpacking the details of Interactive Server Side Rendering
In this rendering mode, the application runs on the server side and UI updates are sent via SignalR connection to the client. In the initial request, the component is rendered on the server, and the blazor server opens the connection between the browser and server via SignalR. All new interactions are handled via this connection.
Exploring Interactive SSR in Visual Studio 22 using .Net 8.0 Blazor
Let us deep dive into the step-by-step procedure of setting up the project for creating an interactive website using interactive SSR mode.
Step 1: Create a new project in Visual Studio
- Select the Blazor Web App project and give it a specific name and location.
- In the additional information, select Server mode from the given interactive render modes for Server side interactivity.
-
Apply interactivity location to the project. There are two options available:
- To apply Server-side interactivity on a particular page or component use Per page/component.
- To apply Server side interactivity on the whole project use the Global option.

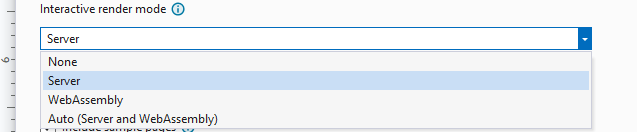
In this blog, we are going to use the per-page/component option.

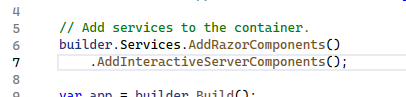
Step 2: Configuring Interactive SSR in Program.cs file
Now that we have set up the project, the next step is to explore the code and see
how to enable and configure interactive SSR in program.cs.
The following services and configuration are required to enable Interactive SSR:

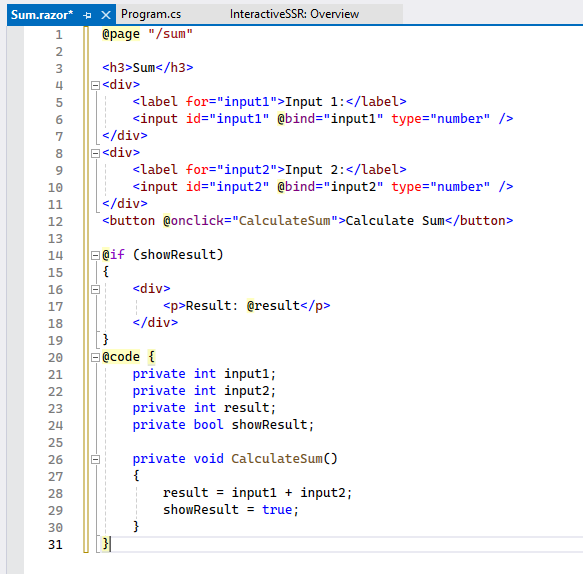
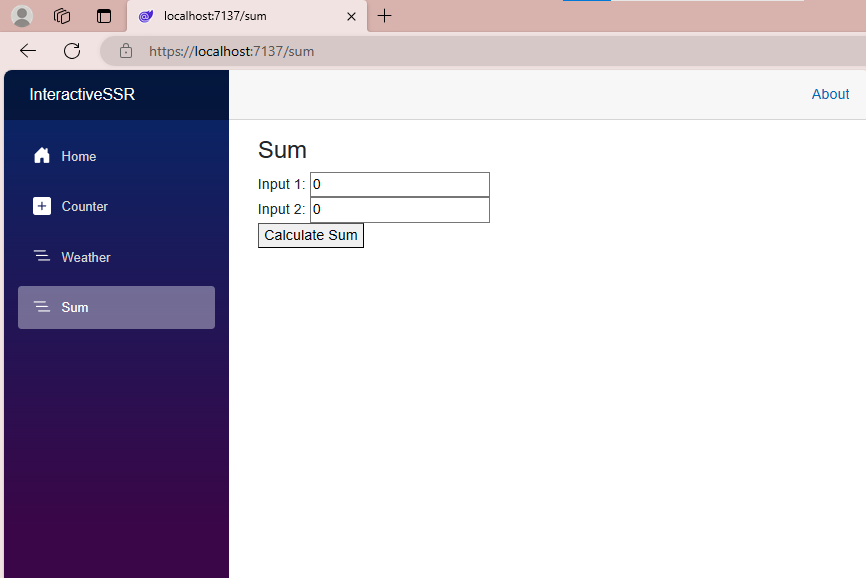
Step 3: Create Sum.razor component
Following is the code to calculate the sum of two numbers and display the result.
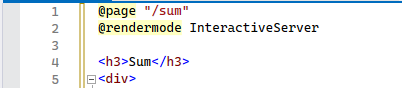
Step 4: Make the component Interactive
To make the component interactive at server-side rendering, add @rendermode InteractiveServer to the component definition.
Step 5: Build the project and run
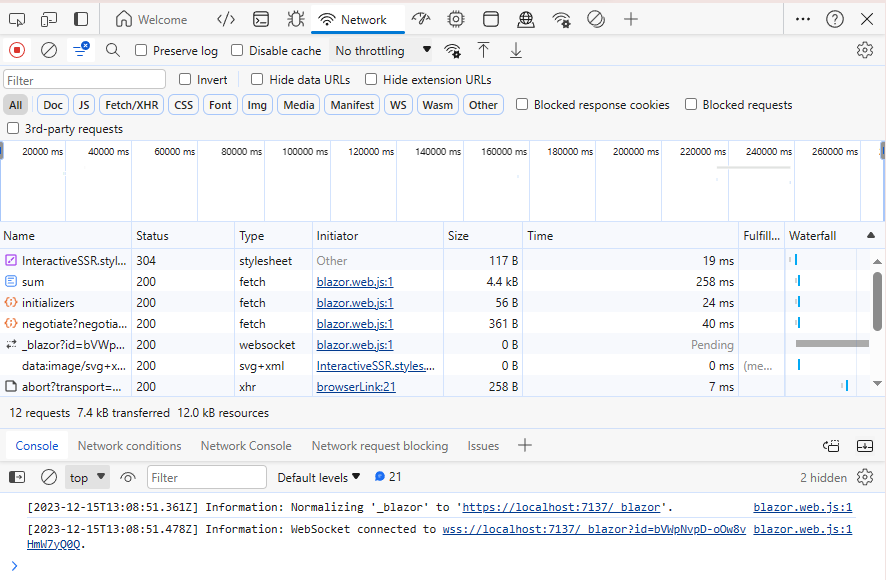
Step 6: Inspect the browser
- To explore queries like Is interactivity enabled? What interactivity is used in this component? Let us inspect the window.
- Here the Network shows web socket connection is established between the client and server as a result of blazor server.
- To see if the interactivity is working or not, give some values in the field and click the button. If the result updates it means the interactivity is enabled.
- In the above example we can see that after calculating the sum of 5 and 6, the result is updated to 11.
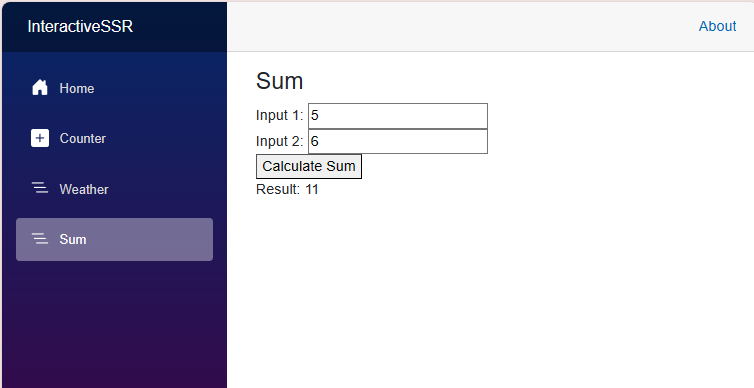
In short, the component is interactive and is being rendered on the server side and communication is occurring through web sockets.